
Audio Compression Explained For Music Producers
I remember a time when compression felt like some kind of music production voodoo that was far out of my reach.
People would say that... "A compressor makes things fat, or warm" but when I was first using them, I wasn’t sure what was actually happening.
These days, compressors are an integral effect for me. I couldn’t imagine working without them.
If I hadn’t learned how to use them, I would be miles behind with my mixing and mastering. Aside from that, once you know how to use an audio compressor, it's fun! :)
Here are a few tips that will help you along to the way to understanding audio compression.
Do I Need To Use Compression On Everything?
No. Follow my golden rule. Listen first, then only apply something if it needs it.
How do I know if it needs it? Well, you need to know what it does, how it works, and what it’s good for. Let’s explain.
Audio Compression Definition
This is the process of reducing an instrument's dynamic range. Dynamic range is the difference between the loudest and quietest sounds of the audio.
What Does An Audio Compressor Do?
It controls and evens out volume. It listens for loud sounds (or transients), then turns them down.
Loud transients are the spikey, punchy, attacky bits of your audio. The initial peak if you will. I have marked these in yellow in the picture below.

The compressor lowers the volume of those loud transients so you can find the ideal balance between the transients and body of the sound.

You can also use a compressor to shape a volume envelope. Kinda like the ADSR envelope on your synth or sampler. Except it is triggered by audio rather than midi, and the controls function differently.
When To Use An Audio Compressor
The most common time to use a compressor is when you want to even out the volume of an instrument or song.
You see, a live recorded singer, bass guitar, drum kit etc will have a big difference between the loud notes and the quiet notes. We use the compressor to control this.
Check out this example of a vocal being compressed. First, you will hear the raw vocal, then the compressed version, then the compressed version with added makeup gain.
The compressor will decrease the dynamic range (i.e. lower the loud bits and turn up the quiet bits).
Using a compressor on a single instrument makes it feel more solid and strong. This is because the volume is made more consistent.
Using a compressor on a full song will have a similar effect but will also make the instruments glue together. Hence the title of the "Glue Compressor" in Ableton.
Audio Compressors In Electronic Music

So you might be wondering... why would an electronic music producer need a compressor if most of their music is made of samples and synths that rarely fluctuate in volume? We are mixing electronic music after all, right?
Well, a compressor can also be used to add or remove attack and to add or remove length to a sound. This can add character to sounds such as snare drums. Even when they are a sample that does not need dynamic control.
There are creative options too. Such as pumping, and excitement.
And even though a sampled kick drum won't fluctuate in volume, you can use your compressor to control the dynamics of your drum group and master bus. There are loud and soft notes in there. The compressor will even out/glue your volume balance together and make things feel more solid.
Compression For Dummies

Ideally, every sound should have it's own compression setting, but to give you a quick start guide, here is one setting that is very useful. This is the most common setting I use (mostly on drums, but often on many instruments). If i could only ever have one setting, it would be this.
- Set a Medium-Slow Attack time (around 3 milliseconds)
- Set a Fast Release time (about 0.1 or 0.2 seconds)
- Set a Ratio 2:1
Now lower the threshold level until you get a Gain Reduction of around 3dB-5dB.
Then, whatever gain reduction you get, add that to the Makeup Gain. Simple.
But what does all that jargon mean?!?
Read on to find out the details, plus how to design your own compression setting for ANY sound.
Ok, let's start by explaining the controls of a compressor.
How To Use A Compressor And Its Controls
Compressor Threshold

We use the threshold knob to set the point that the compressor will activate. When it will trigger.
When the audio or transient exceeds the threshold, the compressor switches on and lowers the volume.
Compressor Ratio

The ratio decides how much the volume will be turned down. Kinda like the amount of compression.
2:1 is a common setting. What this means is that for every 2dB of audio that exceeds the threshold, the volume will be lowered to 1dB. i.e. The volume is halved.
4:1 Would mean for every 4dB of audio that exceeds the threshold, the volume will be lowered to 1dB. i.e. The volume is quartered.
So you can see that it is exponential. By the time you hit 8:1 the compression is so strong that it flattens audio signals. This is what a Limiter is. A compressor with a high ratio.
Gain Reduction Meter

If you follow my steps you will learn how to hear the sound of compression, but to help you out, we also have the gain reduction meter. With this, we can measure how much the volume has been reduced in decibels.
...So The Compressor Makes Things Quieter?
Yes. The loud notes (transients) get turned down. This reduces the difference between quiet and loud sounds (the dynamic range). The byproduct is that your instrument will feel quieter.
This is exactly why a compressor has a knob called Makeup Gain.
Compressor Makeup Gain

This lets you add some volume back in after the compression has been applied. It is very important that you make sure your instrument volume is the same whether the compressor is activated or bypassed.
This makes it much easier to identify if the compressor is making the audio sound better or not.
You see, humans tend to like loud sounds. When given two choices we prefer the louder one. We get fooled. So the only way to know for sure if your setting is helping is to use the Make Up Gain and match the volume output of bypassed and active states.
As a rough guide, if you could see on the GR meter that you have a gain reduction of 3dB, then add about 3dB to the Make Up Gain. Then fine tune it by ear.
Some compressors have an Auto Gain function. This is very handy but it is not always accurate. I find I get better results doing it manually.
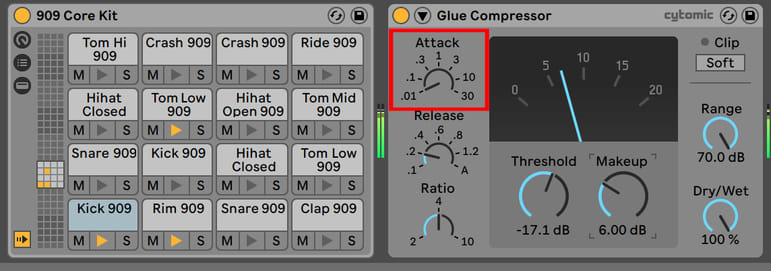
Compressor Attack

The attack controls the time between the audio breaking the threshold, and when the compressor starts to lower the volume.
A long attack will let a bit of untouched audio through before the volume decrease. This will give the feeling of added punch, but won’t control the sound that well.
A short attack will control that initial impact much better. It will do a better job of leveling out the volume, but it will make the impact of the sound softer.
So you must decide. Does my sound need more punch or less punch? More control, or less?
Compressor Release

The release knob sets the time it takes for the compressor to reset after the audio falls below the threshold. i.e. once the compressor has finished lowering the volume, this decides how long it takes to raise the volume back up again.
A short release will sound pumpy, exciting, and you will definitely notice the compression sound. This can be great on drums.
A long release will be more smooth and transparent. Great when you need to hide the compressor e.g. on jazz or folk music.
For electronic music, we usually set the release to be noticeable and pumpy, but also in time will the tempo of the music. Try to get the volume pumping up and down in time with your song.
How To Make A Compressor Settings For Any Sound

- Set your Attack and Release to the fastest
- Set your Ratio to full (inf:1)
- Set your threshold to 0dB
- Lower your threshold till you hear/see some gain reduction. Around 5db or more on the gain reduction meter.
- Adjust the Attack until you have the desired amount of punch, softness, and control on your transients.
- Adjust the Release until the compressor makes the volume pump rhythmically in time with the song. Not too rushed, not too slow.
- Lower the Ratio until you have the desired amount of compression. from 2:1 to 4:1 is a pretty standard setting for an instrument whereas a mastering compression ratio might be as low as 1.5:1.
- Add some Makeup gain to compensate for the gain reduction
That’s it. You did it! :)
Sometimes I double check my threshold setting one more time in the end, but that’s about it.
You can use this formula to make a compression setting for any sound.
How Much Compression Should I Use?
As a general guide, less is better than more. It is very easy to Over Compress things. I usually only use enough to either control the volume of the sound or shape the attacks.
Keep in mind that if you have compression on a snare, the drum group, and the master bus, it all starts to add up.
Using 3 compressors like that is a good technique, but only if you keep their settings gentle and modest. It's this combined effect of little bits of compression along the way that sounds nicer than simple one compressor on your master bus.
Having said this, you should also experiment with dramatic compression on occasion. Just be aware that you are going crazy for the sake of it.
Such heavy compression and side chain compression has made certain songs into memorable, stylized hits. Like Benny Benassi's Satisfaction, for example,
Common Compression Mistakes
Using Too Much Compression

It is an addictive sound. Compression is kinda like binge drinking. It seems like a great idea at the time, but go too far and you will regret it the next day.
Setting Your Attack Time Too Fast On Your Drums
If you set the attack too fast it will soften and squash your drums. They will lose their punch.
Distortion And Buzzing

Setting your attack and release times too fast can also cause audible distortion and buzzing. Especially on low frequency sounds like bass lines.
Not Testing Other Compressors
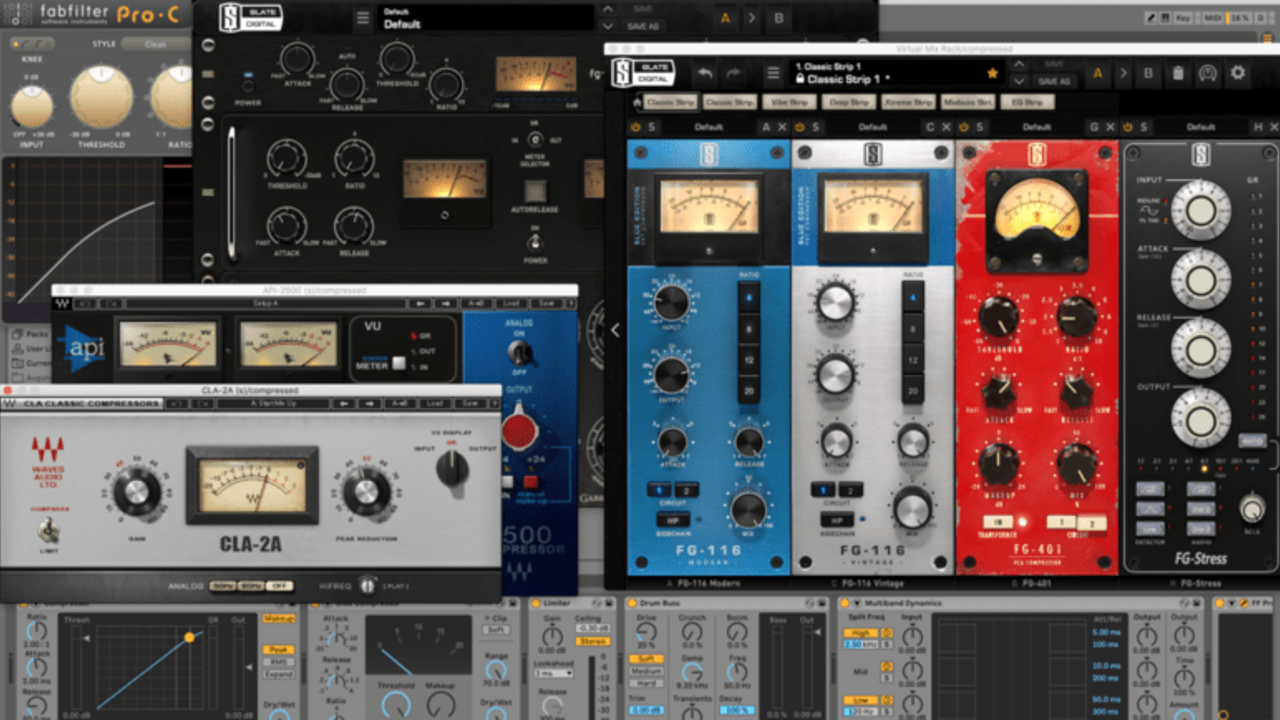
 There are many types of compressors and they all have their own unique character. Some are better suited for certain sounds and tasks. Your job as a music producer/mix engineer is to discover what compressor works best on what sound.
Conclusion
Compression makes things sound solid, strong and glued together. It is an integral part of the sound and vibe of modern music. When used correctly, it will become one of your favorite effects. Hopefully this compression guide has given answers to some of your questions.
I could keep going on and talk about different types of audio compressors. Like Peak vs RMS, Soft vs Hard Knee, FET vs Opto, Tube vs VCA, Side Chain, Parallel, Multiband, Upward Compression, pre vs post EQ, lookahead, Ableton vs Logic Pro, and Analog vs Digital...
...but this post is long enough for today.
If you want to learn more about compression and my top tips on how to use it in electronic music mixdowns, then check out my courses.
Over To You
What compression tips do you like? What are your favorite compressors?
...and what other songs use heavy compression to good effect?
